
I am all about efficient shortcuts – in quilting, crafting, and life in general. What is the fastest way to do something without compromising the quality of what you make? Sometimes I learn these neat little tricks through research and other people’s generous sharing of insight through books and blogs, but most often I learn through trial and error. What better way to discover what works for you than trying it out for yourself? Recently, I taught an English Paper Piecing class at gather here. EPP and I go way back, but I’ve learned a few things about it along the way. I’m not going to write a tutorial on how to English Paper Piece as there are already a zillion in existence. Besides, I think Jennifer Mathis at Ellison Lane has made pretty much the clearest and most straightforward one out there. I do want to share two things that make English Paper Piecing a breeze for me.
First, go check out Jennifer’s tutorial. It’s only 5 1/2 minutes long, and really you could even stop at the 4:30 mark. Then hop on back here.
Ready? Cool. So. The first thing I want to share with you is this:
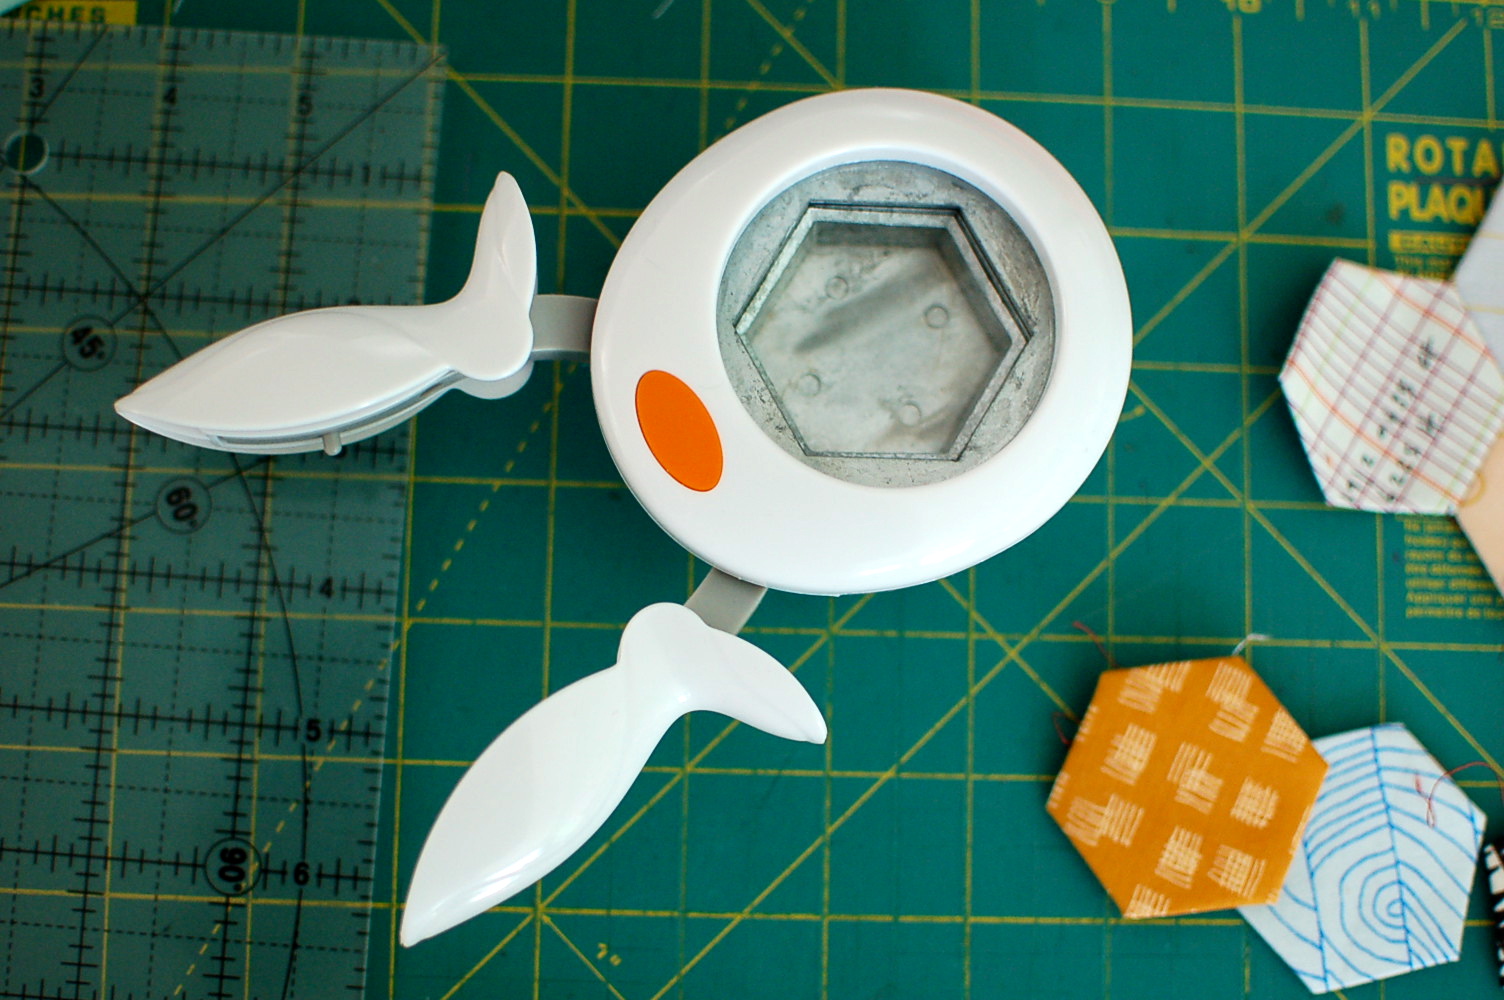
Instead of printing and cutting my templates, I use this handy dandy hexagon hole punch by Fiskars. I have the extra large size, and it yields perfect 2″ hexies. You can stick up to 4 sheets of paper in there at a time and just squeeze away. It also gives you more options as to what you can use for your hexie templates as it makes it easy to recycle envelopes and heavier stock paper than just straight up printer paper. You can even get your minions, I mean, kids, whatever, to help out and make a few dozen hexies. My little heathens went bananas over it because they are all about gadgets and doodads, and hole punches are freaking amazing as far as they are concerned.
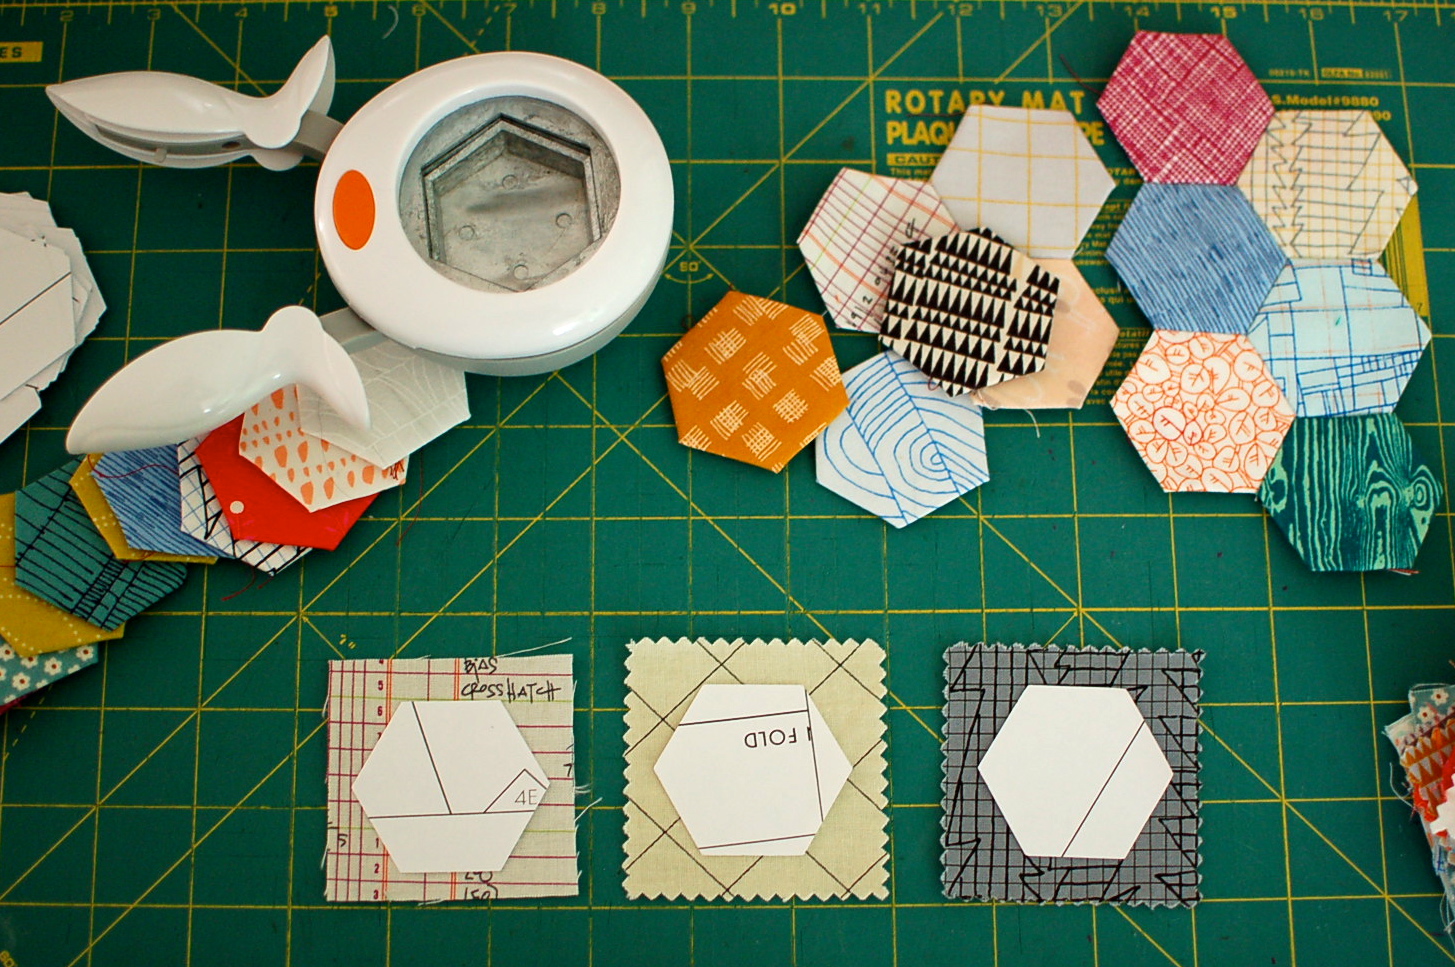
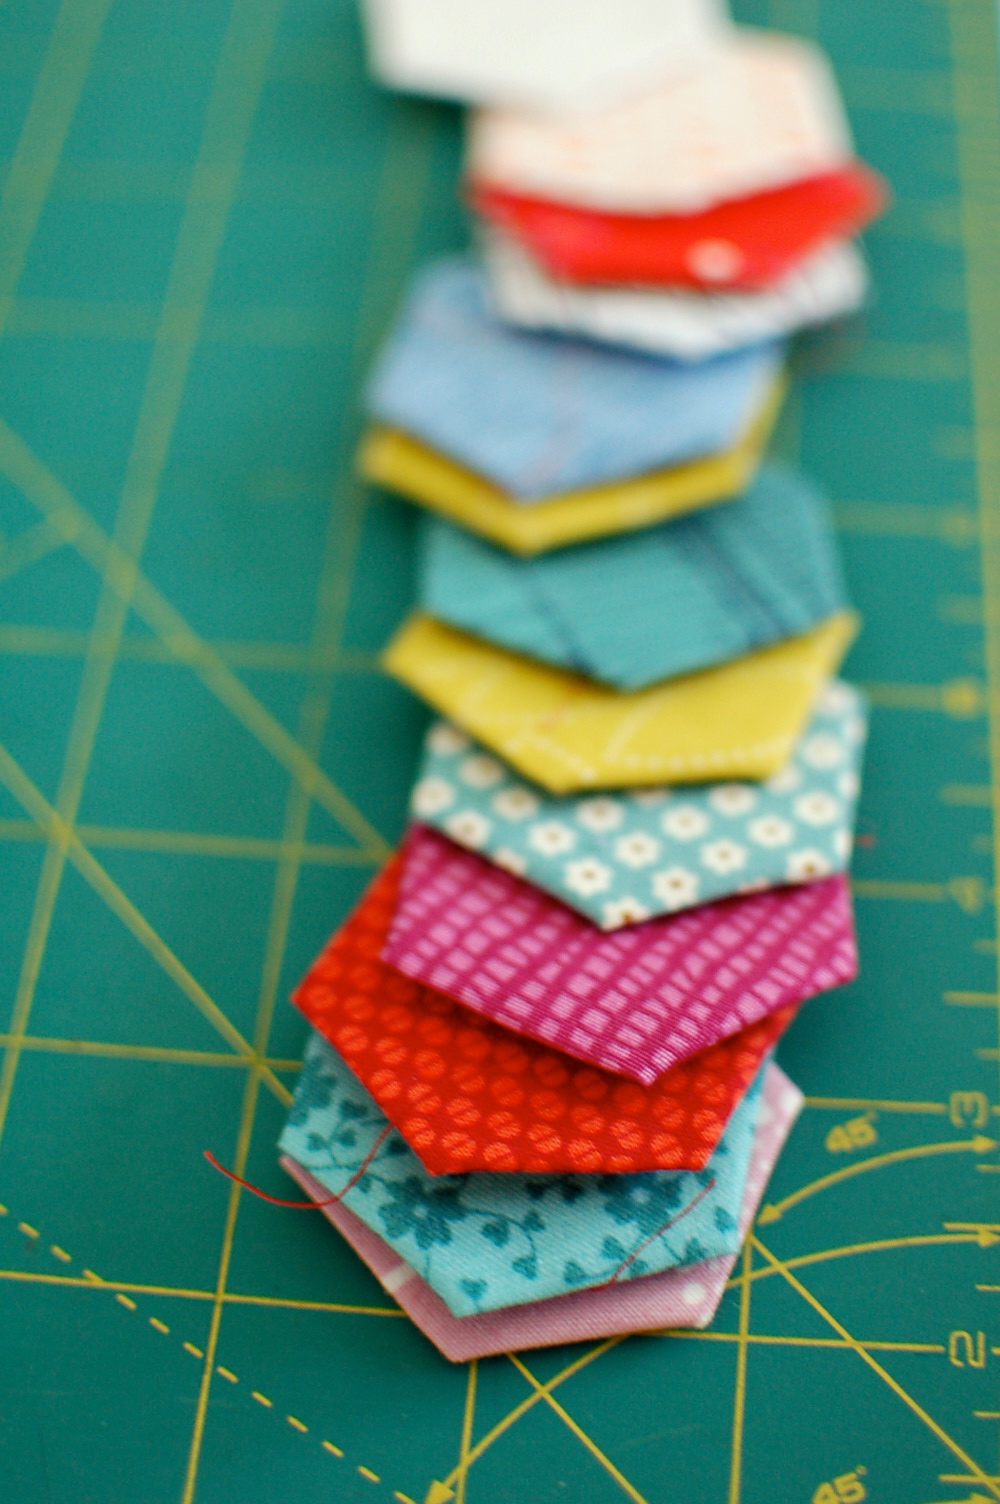
The second thing I want to share with you is another pretty simple time-saver – you don’t need to cut your fabric into hexagons. You can just use a bunch of 2 1/2 inch squares, making precuts perfect for EPP. It seems so basic, but a lot of people, myself included when I first started, think the fabrics you’re using need to be cut into hexies first. I know some folks will say you absolutely have to do this in order to eliminate bulk, but really it doesn’t matter. Cutting individual hexagons from fabric, especially at such a small scale, can be fussy and time-consuming, thus throwing it into the realm of “pain-in-the-ass.” Once a method or technique goes there, you will rarely want to use it. Besides, even if you cut carefully, you are still going to have waste fabric. Why not skip that step, save some time, and just cut up some quick squares? Or use those mini charms packs that we all somehow end up with!
Random tip: before you join your hexies, press the crap out of them. It will make joining them that much easier when you have crisp flat edges.
Oh! One more thing! Don’t forget to have fun with it.

“hex” appeal, haha! So once you’ve made a bunch of hexes, how do you sew them all together? Do you remove the paper from the inside?
Hi lady! You whipstitch the hexies together. You leave the papers inside until you have sewn all your pieces together and then you can pop them out. I’ll post a quick tutorial tomorrow. xo